
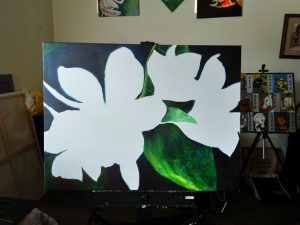
Use a primed canvas to paint or apply two coats of gesso to prime it before proceeding with the project. Use either charcoal or paint to loosely place the forms before continuing to cover the back ground with a mix of paynes gray, viridian green and smaller portions of sap green.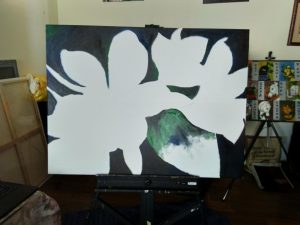 Using mix of viridian green and paynes gray, fill in the leaves keeping in mind the form and shape of individual leaves. The portion that has a brighter sun spot is filled in with green and lemon yellow.
Yellow ochre and lemmon yellow are to be added in with green to further accentuate the veins and stems, slowly finishing the basic background details. Some titanium white is also added to green to bring a much defined delineation of the leaf forms from the background foliage.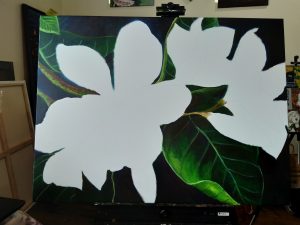 White mixed with a tinge of yellow and gray is used to fill in the flowers. Attention is paid with applying a slightly darker shade to the areas where the petals cure forming shadows.
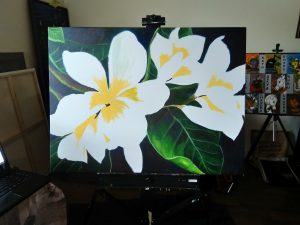 Medium yellow is introduced to the centers of the flowers and feathered out . Before the paint dries, vermillion is added to the very centers and blended into the yellow.
 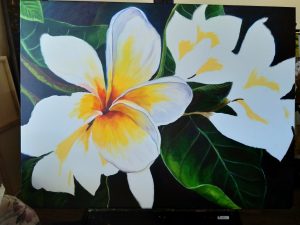 This is then followed by applying crimson mixed in with some sienna to bring more definition to the center of the blossoms. White mixed in with violet and gray is blended into the shadows. Some quinacridone magenta mixed in with white is added to the extremities and veining of the petals.
 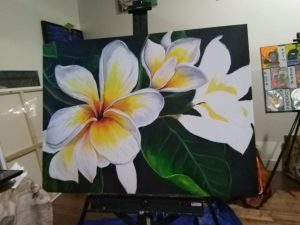 Curve of the folded petls in the buds is paintied in with shades of gray and magenta mixed in with white. A splash of yellow is blended in at the right spots to finish up the flowers.
 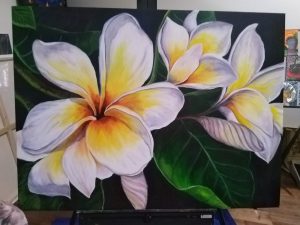 Couple coats of varnish after the paitning is completely dry brings out the colors and adds a great finish to the artwork.